Learn how to get any Minecraft cape in Java Edition without using mods. This easy vanilla trick lets you swap textures and use rare capes for free. Follow our simple guide to update your look.

Getting a cool cape in Minecraft usually means spending money or waiting for a massive event. But what if you could just swap the files and see any cape you want while you play? The best part is that you don't need to install any sketchy mods or third-party launchers to do it.
This method is totally vanilla. It works by tricking the game files into loading a custom texture instead of your default one. Keep in mind that since this is a local file change, only you will be able to see the cape, but it is perfect for taking screenshots or just feeling like an OG.
Here is how you do it.
Step 1: Clear Your Cache
First, you need to clean out your old skin data so the game can generate fresh files.
- Close Minecraft and the launcher.
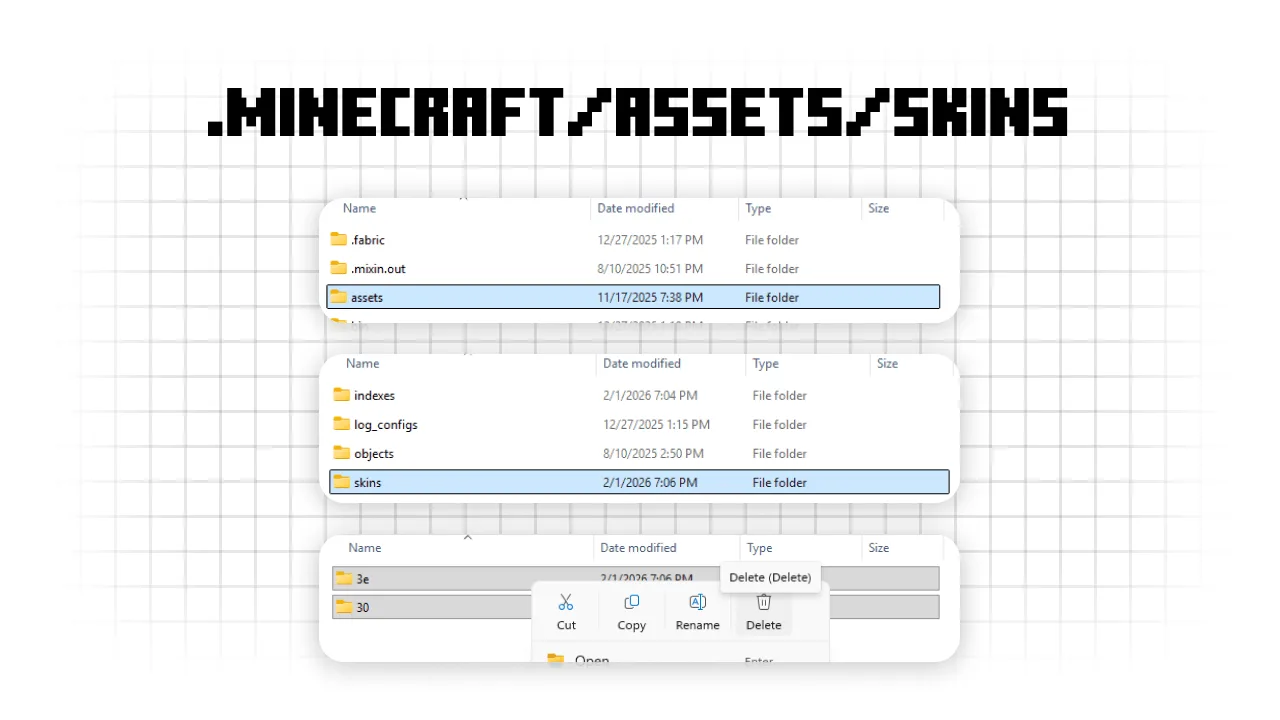
- Press Win + R, type
%appdata%, and go to.minecraft/assets/skins. - Delete everything inside that folder. Don't worry, this won't delete your actual skins, just the temporary files the game uses to show them.
Step 2: Generate the Files
Now you need the game to create a new file for your current skin and cape.
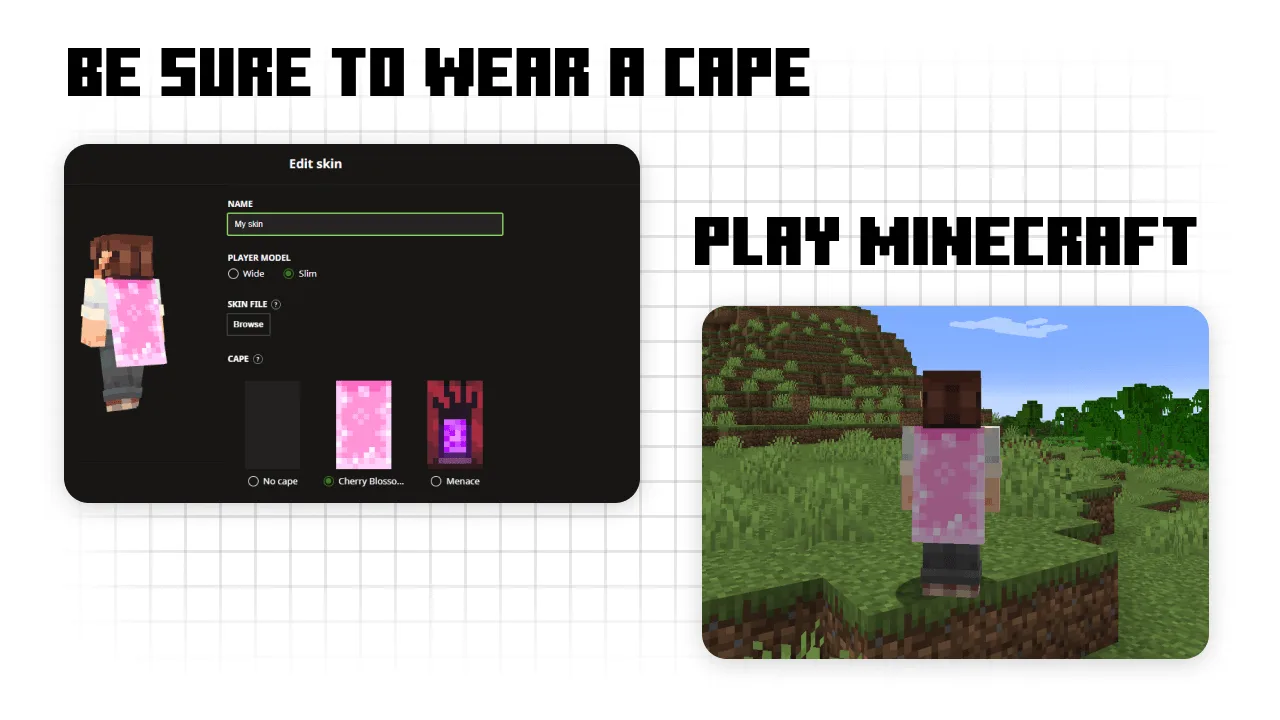
- Open the Minecraft Launcher and go to the Skins tab.
- Make sure you have your skin and any cape equipped. Even the basic Migrator or Vanilla cape works.
- Launch the game and join a single-player world. Once your character loads in, you can quit the game.
Step 3: Find the Cape File
Go back to that folder from step one: .minecraft/assets/skins. You will see a couple of folders with random two-letter names.
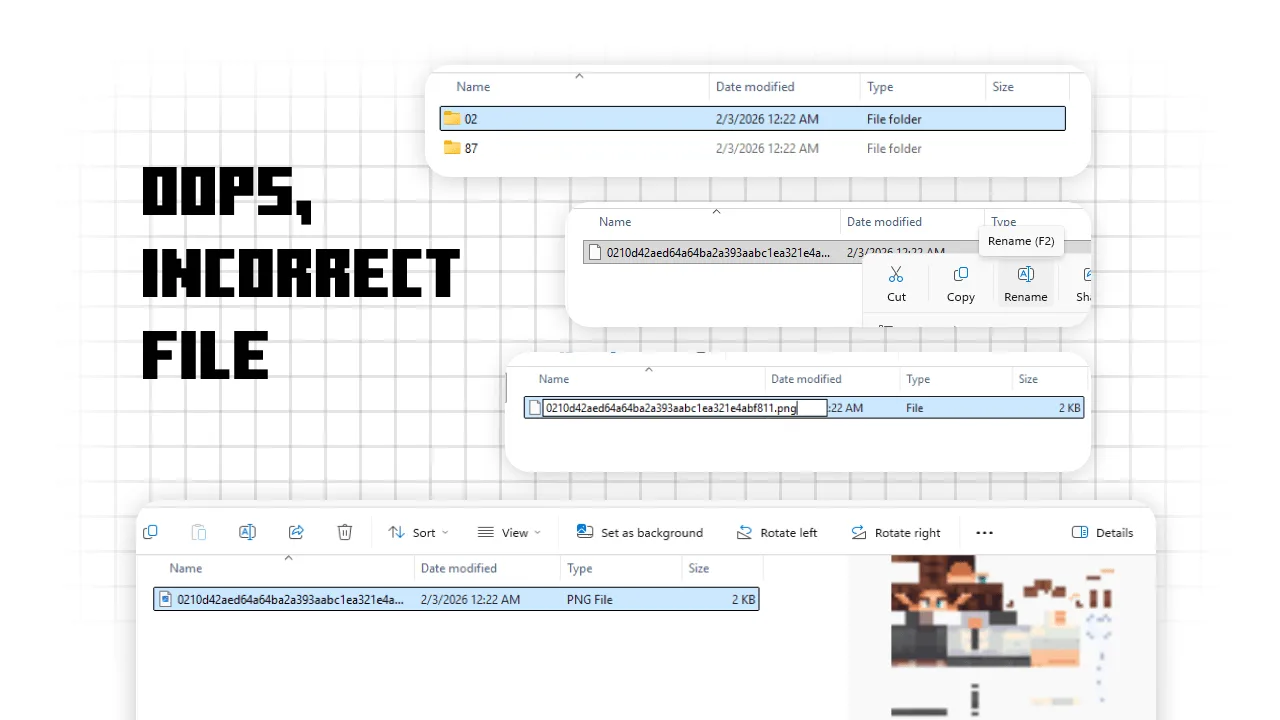
- Dig through those folders until you find a file with a long name made of random letters and numbers.
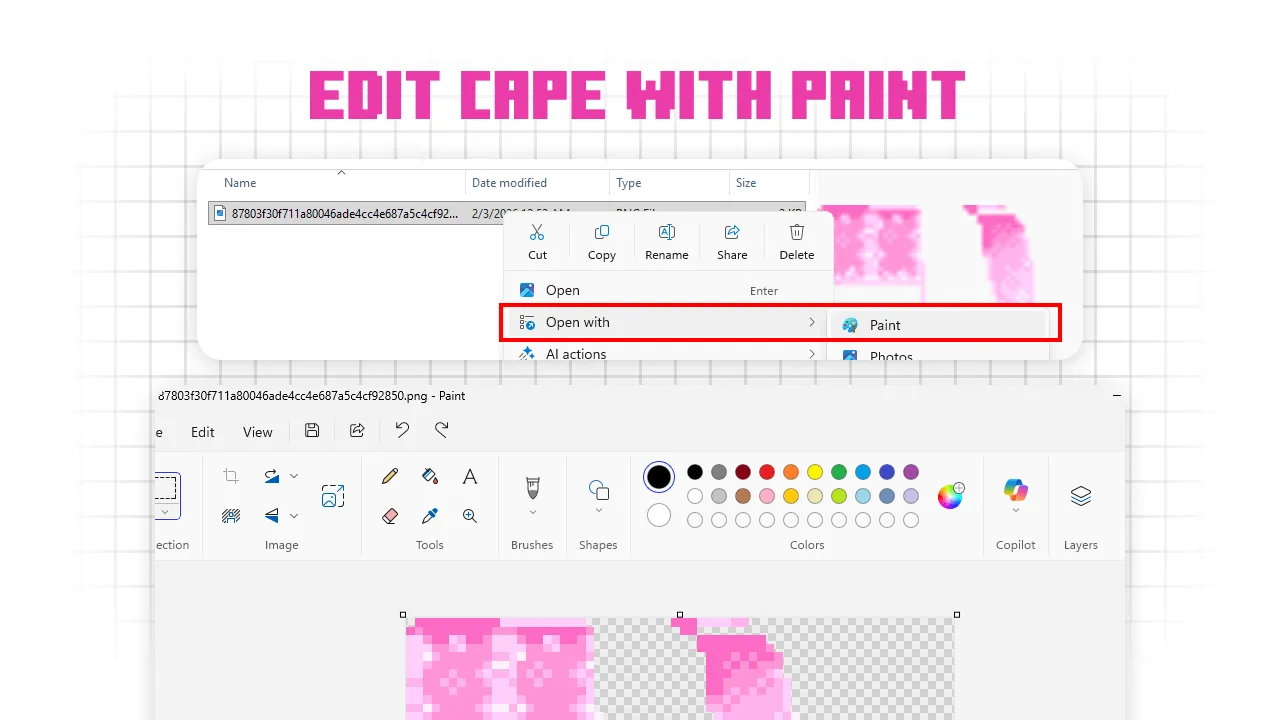
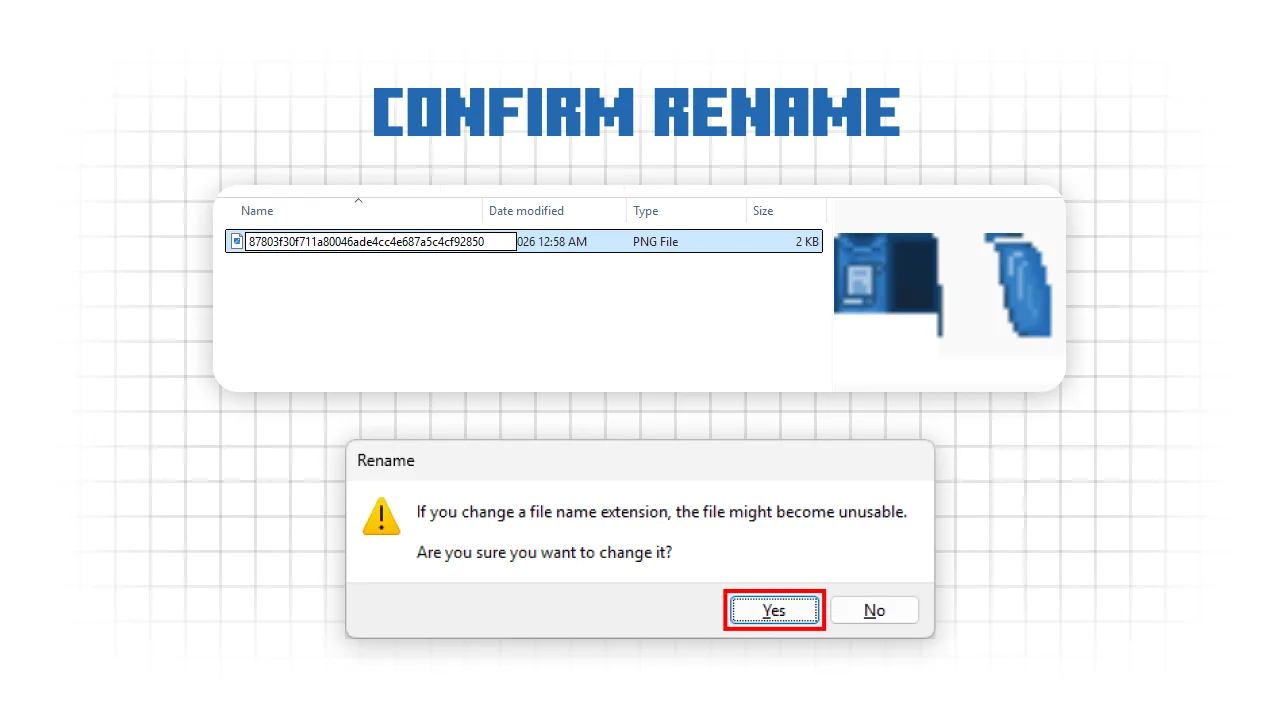
- To see which one is the cape, right-click the file, rename it, and add .png to the end.
- Do this until you find the image that looks like your current cape.
Step 4: Swap the Texture
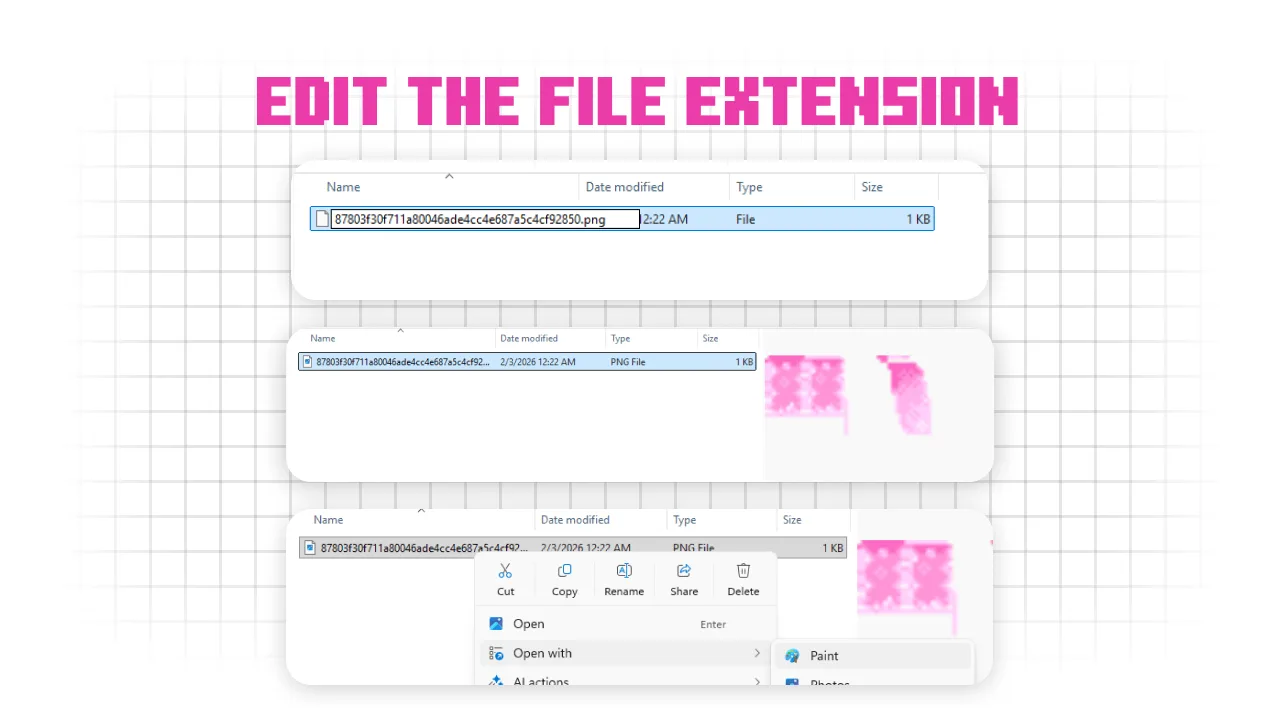
Now for the fun part. You need to replace that image with the one you actually want.
- Open your cape file in a program like Paint.
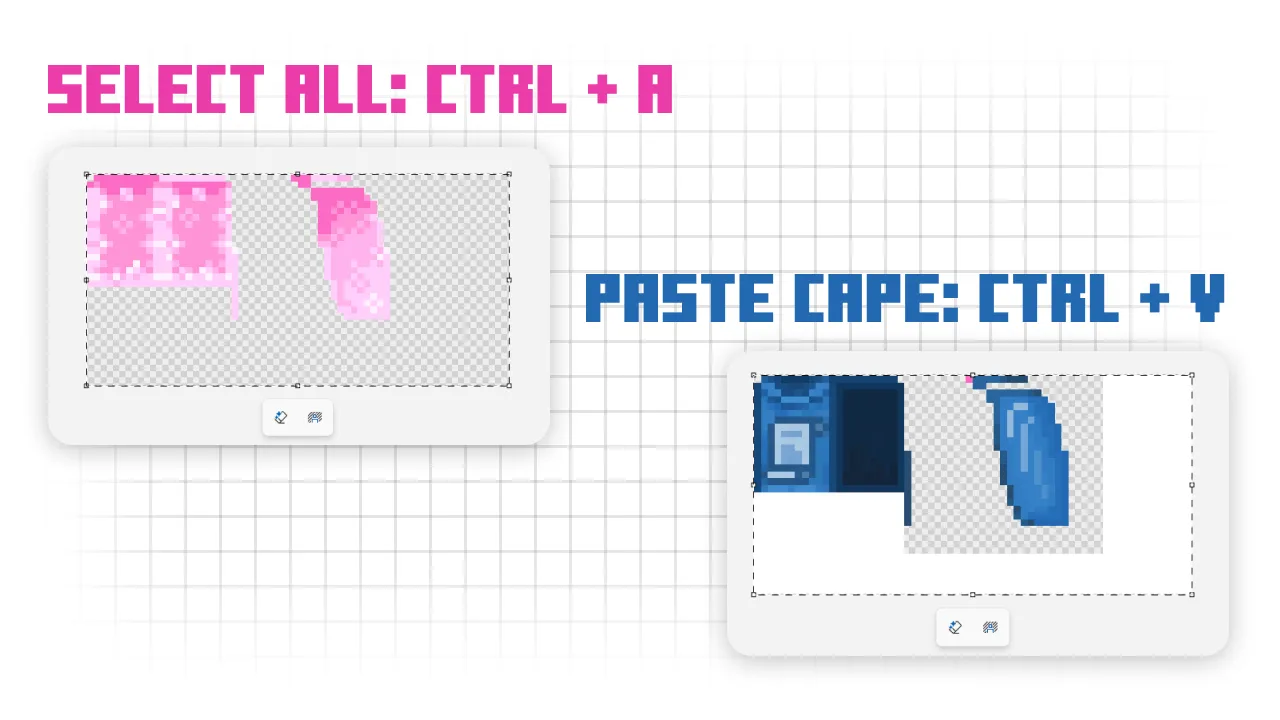
- Go to a site like skinsmc.net/capes to find the design you want.
- Right-click the cape you like and select Copy Image.
- Back in Paint, press Ctrl + A to select the whole canvas and then Ctrl + V to paste the new cape over the old one.
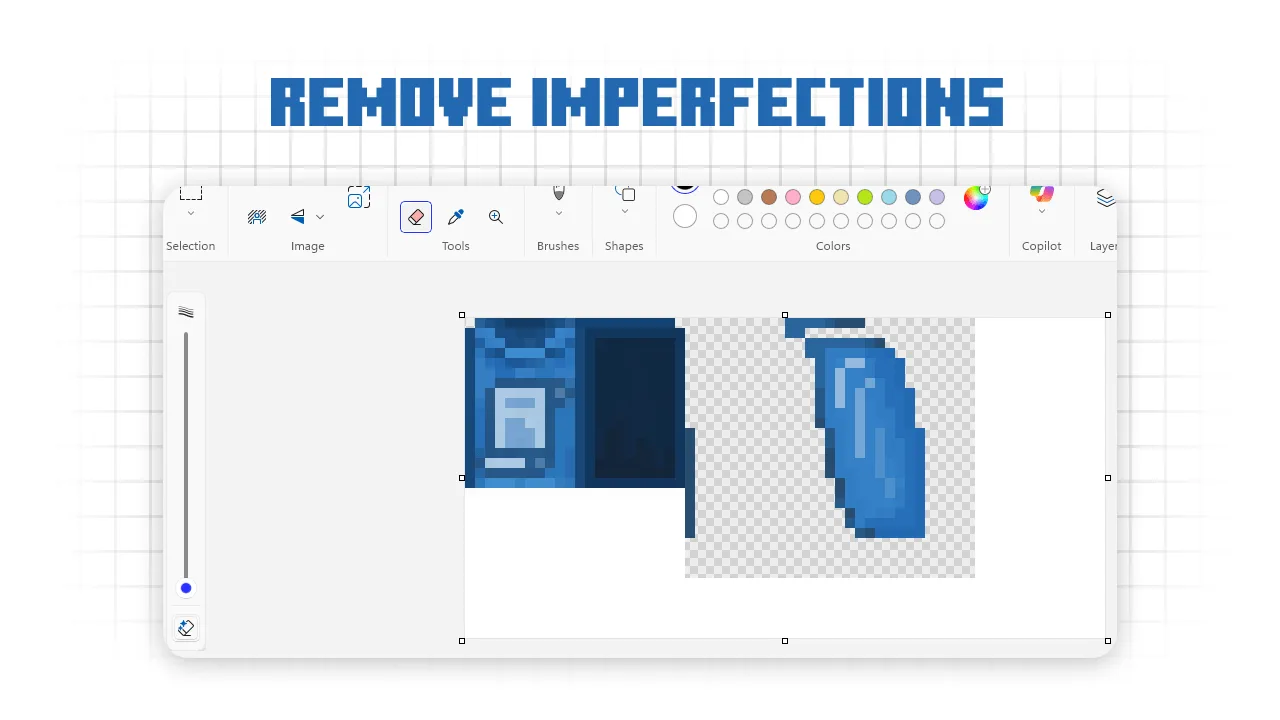
- Save the file and close Paint.

Step 5: Final Touches
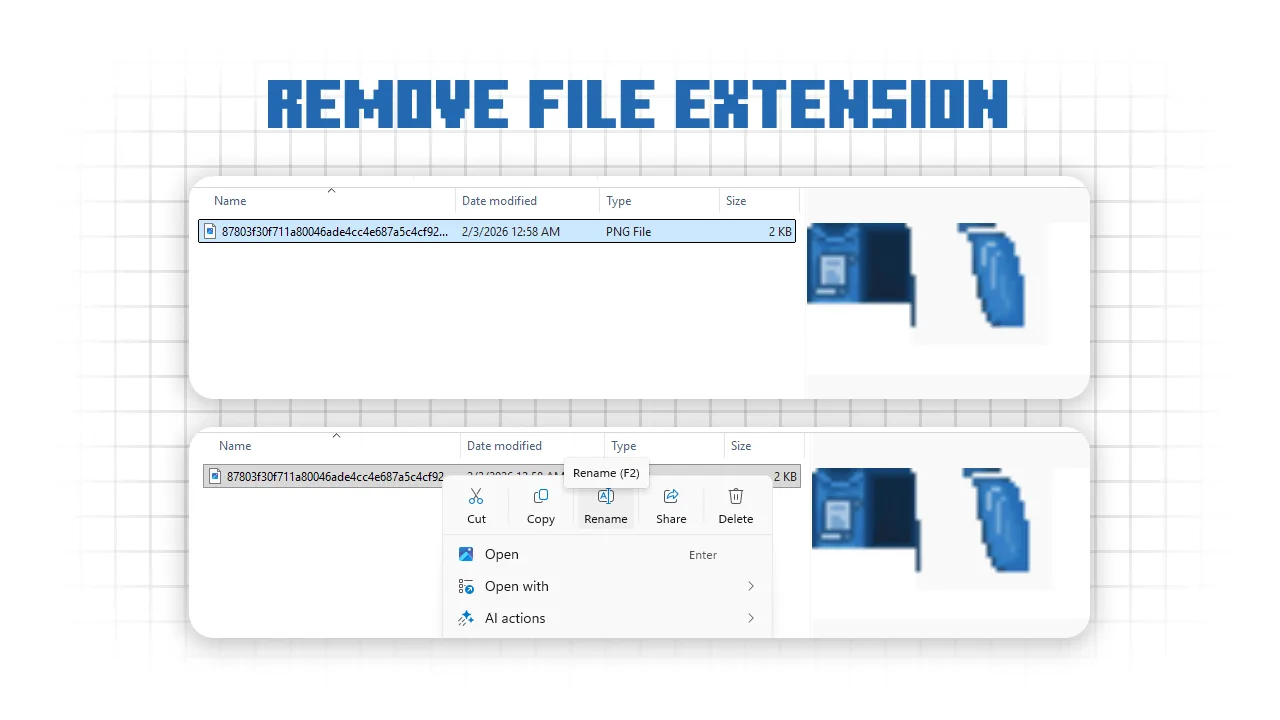
Before you start the game, you have to make the file look "normal" to Minecraft again.
- Go back to the file you edited and rename it to remove the .png extension.
- It should go back to being a file with just a long string of random characters.
- Open Minecraft and jump into a world.
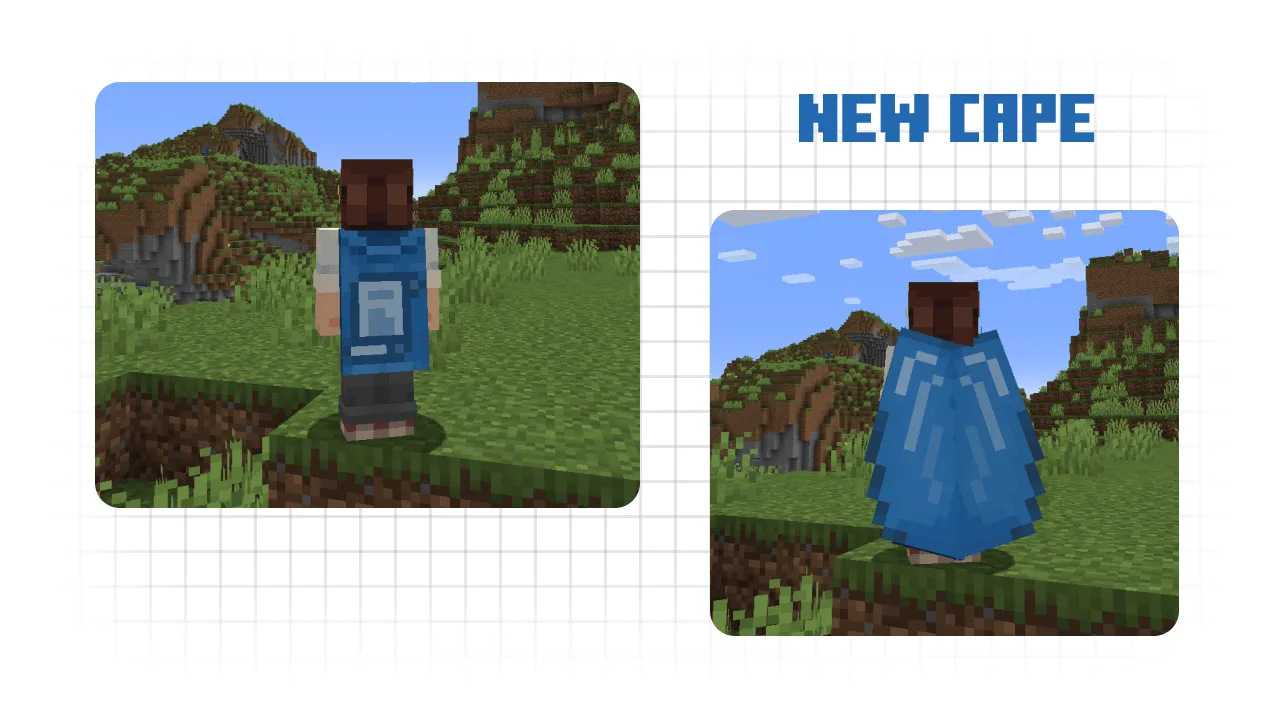
Conclusion
That is all there is to it. You should now be rocking whatever rare cape you chose right inside your vanilla game. It is a quick and easy way to test out how different capes look with your skin before you decide to go hunt for a real one.